Shada’s Avatar Guides
VRChat Mobile Tricks
Outlines on VRC Mobile (With Images)
Getting Outlines to Work on VRChat Mobile
It’s a well-known fact that outlines don’t work on the mobile version of VRChat—even the standard toon shader has its outlines stripped away when you build it for mobile. So, how can you get outlines to work on standalone? That’s exactly what this guide will teach you.
You will need
– Unity
– The Creator Companion
– VRCFury (Installed through the creator companion)
– Blender
Got all of that? Good, let’s get to work!
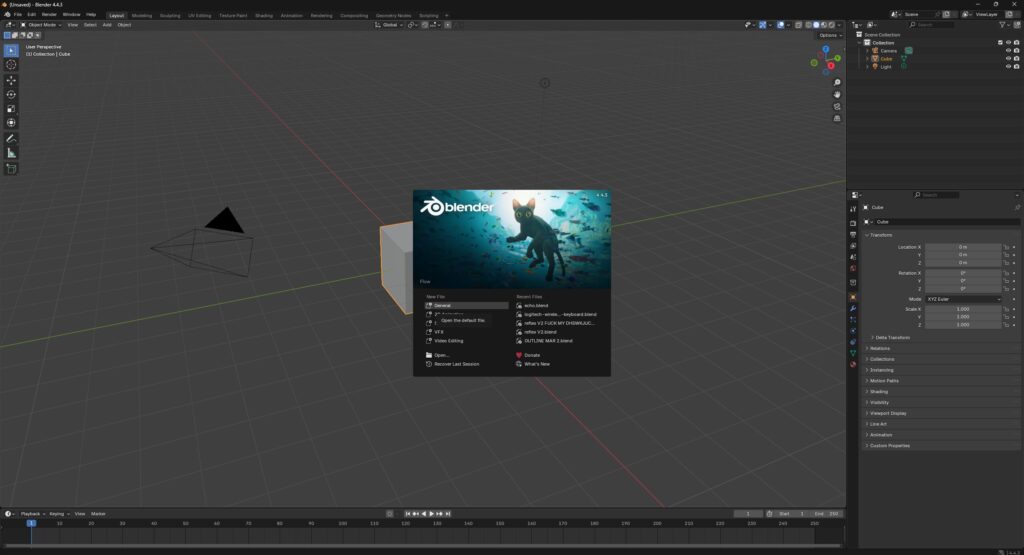
Open Blender and you should see this upon opening the program. Open a general project, and find your avatar’s FBX file (your mesh)
After that, drag and drop it into Blender.
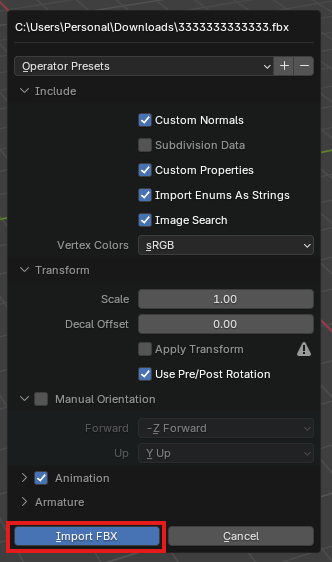
Upon dropping, you’ll be greeted with a context menu; click the blue ‘Import’ button.

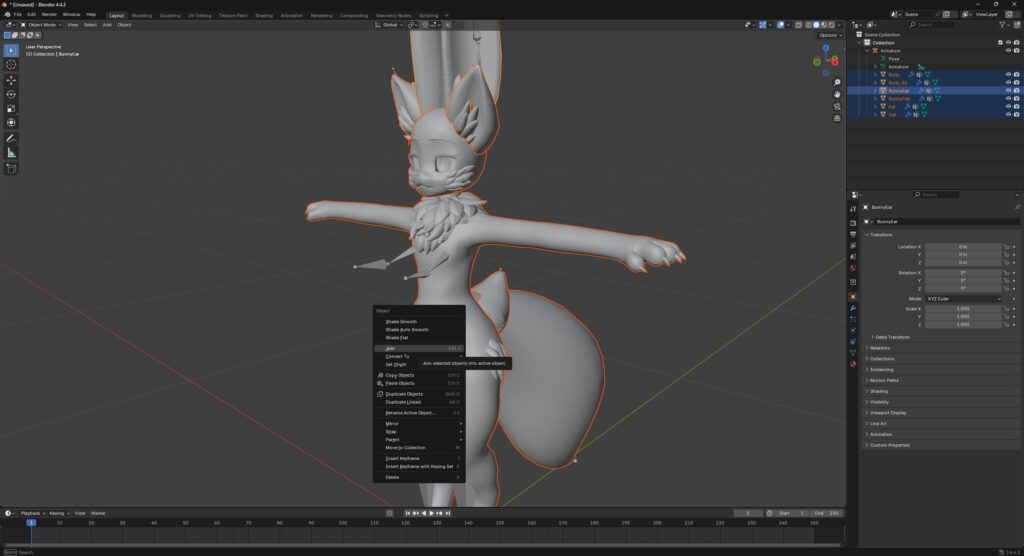
If your avatar has different meshes for the main body like this (I’m using the Maruchi to show this) you’ll want to Shift + Left-Click the meshes in your viewport, right-click to bring up a menu and click the option to ‘Join’ your meshes, shown in the image below.
The next step is to prepare the model by deleting the parts you don’t want the outline to affect. Think of this process as creating a mask, but instead of using a black and white image, you’re manually removing the sections yourself.
First, switch to Edit Mode by pressing the Tab key on your keyboard. Alternatively, you can go to the top-left of your viewport, click the dropdown menu that says “Object Mode,” and select “Edit Mode” from the list.
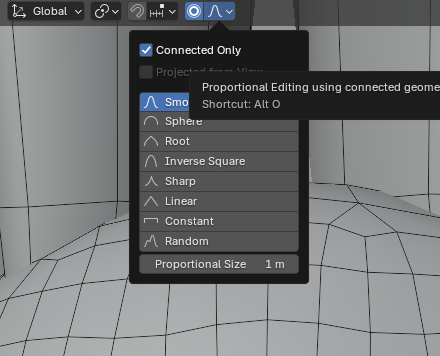
Turning on proportional editing will save you a lot of time. While in Edit Mode, go to the top-middle of your viewport and click the icon that looks like a circle. Next, click the dropdown menu next to it and turn on “Connected only.” This feature makes it so you can move just the connected parts of the mesh you want, making it much easier to position and delete the objects you don’t need.
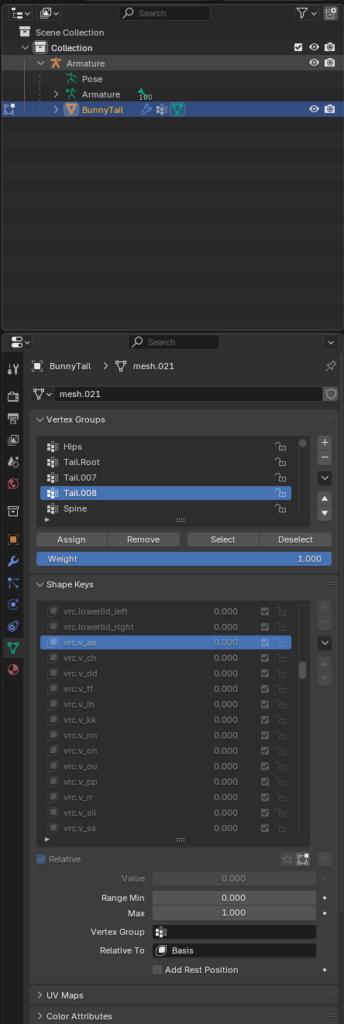
A good tip to make things easier is to select a viseme shape key that opens the mouth of the mesh, which prevents you from having to clip into it. To do this, go to the menu on the right side of your screen and click on the green triangle icon—it’s the second one from the bottom. From there, just select the “aa” viseme shape key.

After that’s done, you can select a small part of each individual mesh you want to remove and drag them to a new spot. This lets you Shift + Left-click and drag without accidentally selecting the rest of the mesh.
Once the unwanted parts are selected, press the Delete key on your keyboard and choose “Vertices.” You may need to repeat this process a few times to completely remove all the unwanted pieces.
Alright, you’re almost done with the Blender part.
- Press the A key on your keyboard to select everything in your mesh (all vertices, edges, and faces).
- While holding down Alt, press the S key.
- Slightly drag your mouse up to “inflate” the model a bit.
If everything went well, you’re finished with the Blender steps. Now, export your model as an FBX file and move over to Unity.
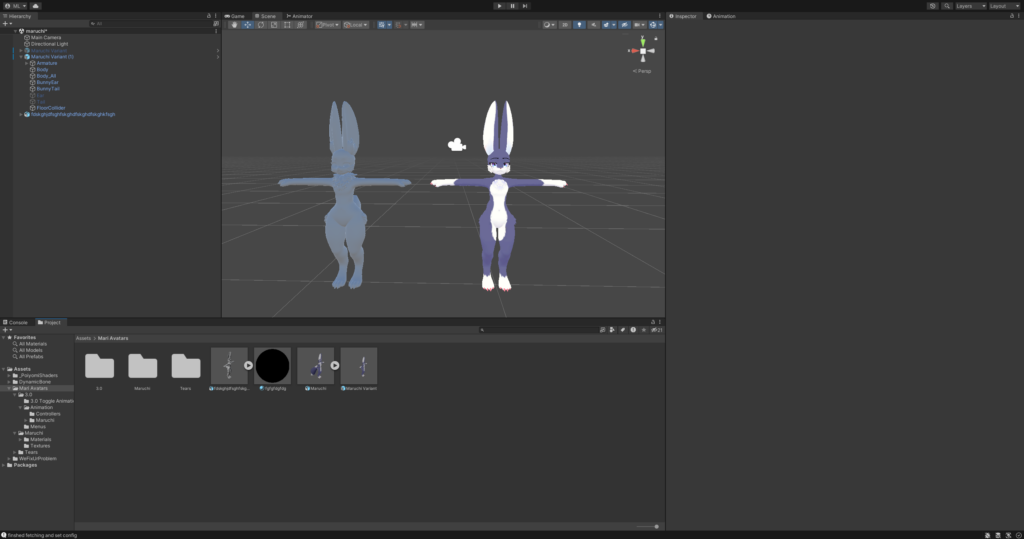
So, I will assume you have your avatar set up already. Find your new FBX file that you just exported, drag and drop it into the project tab on the bottom of your Unity editor and then drag that newly imported model into your viewport. (My exported mesh is pure white, the textured one is the actual avatar)
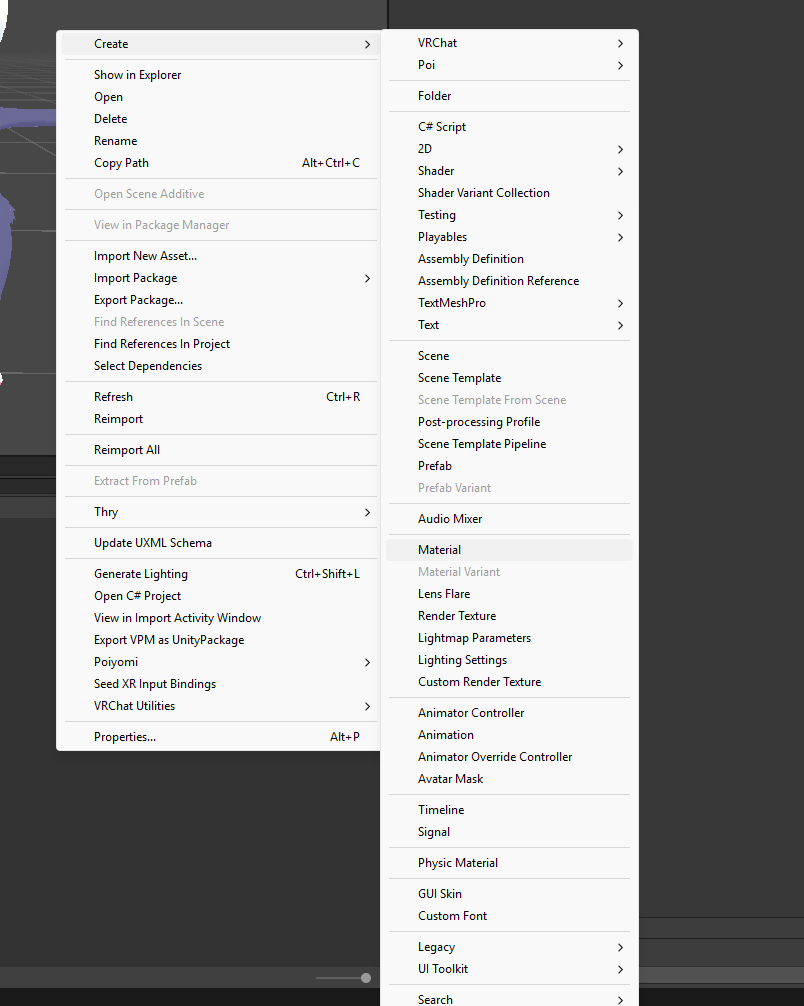
Now, right-click on the project window, hover over ‘Create’ then click on ‘Material’ and give it a name like ‘Outline’ to remember what it’s for.
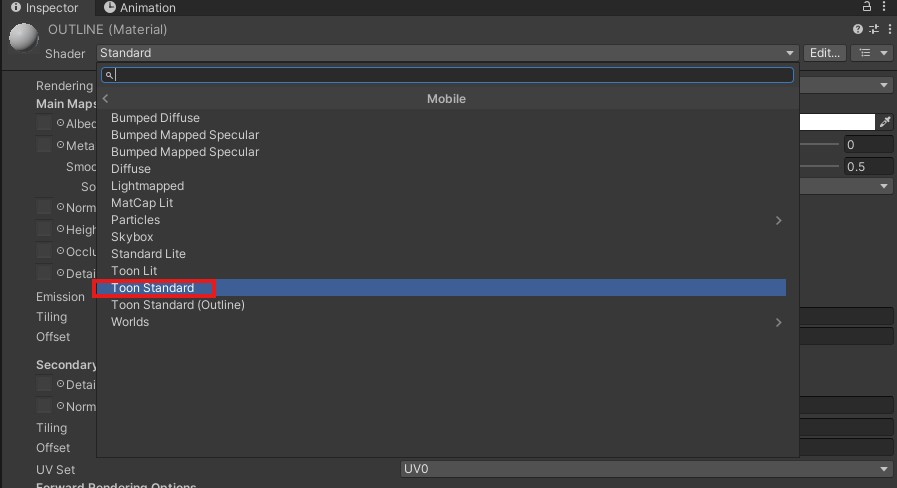
In the Inspector window, open the shader drop-down menu and choose
VRChat → Mobile → Toon Standard.
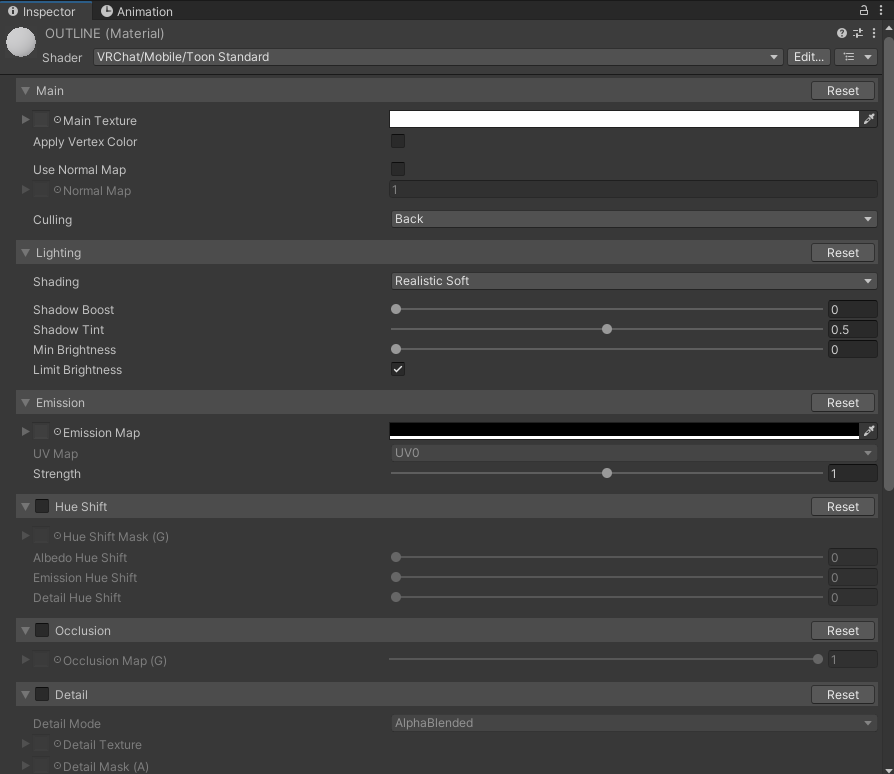
Set its shading to ‘Flat’. Change culling from ‘Back’ to ‘Front’. Then you’ll have your material. Well done!
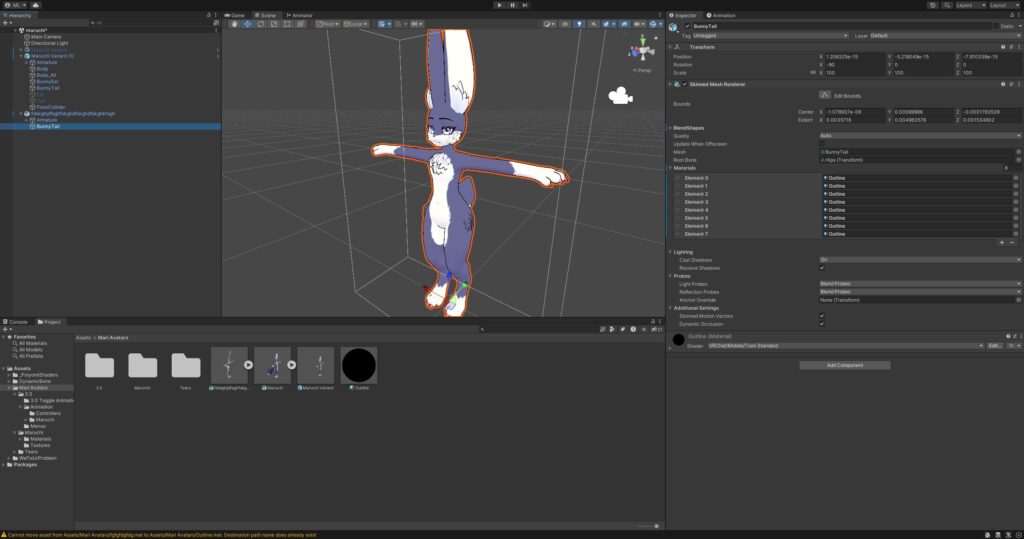
Now, click on your mesh
renderer and change every
material slot to your new
outline material. And look at
that! That is an outline that
works with standalone
VRChat, but you’re not done
yet.
You see, the visual side is done. But if we were to upload it now, nothing would work.
Everything is disconnected. This is where VRCFury comes in! Before doing anything, make sure the import settings for the model and the outline match.
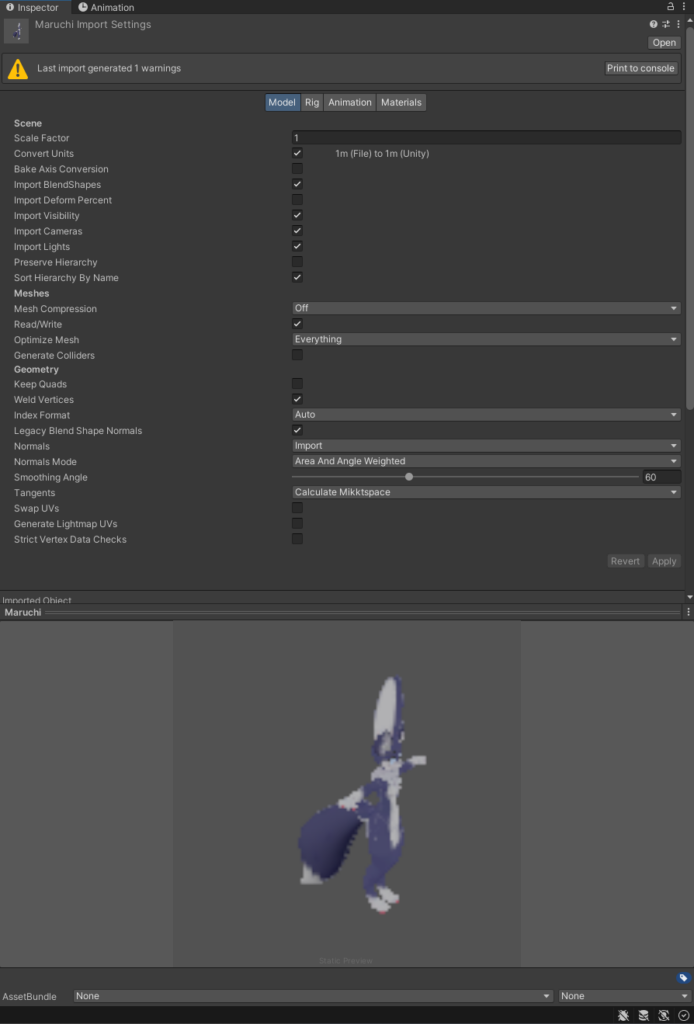
These are the import settings we want for the model category.
This is what we have. So make sure to match your outline’s import settings with your actual mesh’s. Next we want to make sure the rig’s match
Our outline is set to Generic by default. This is bad!
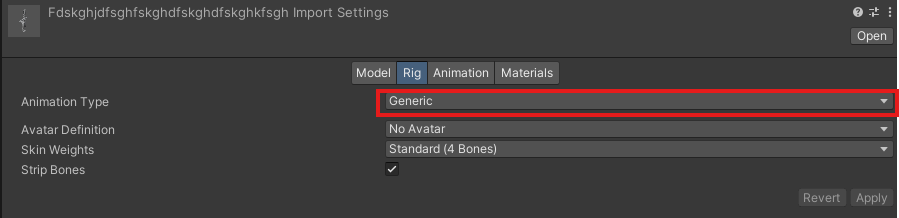
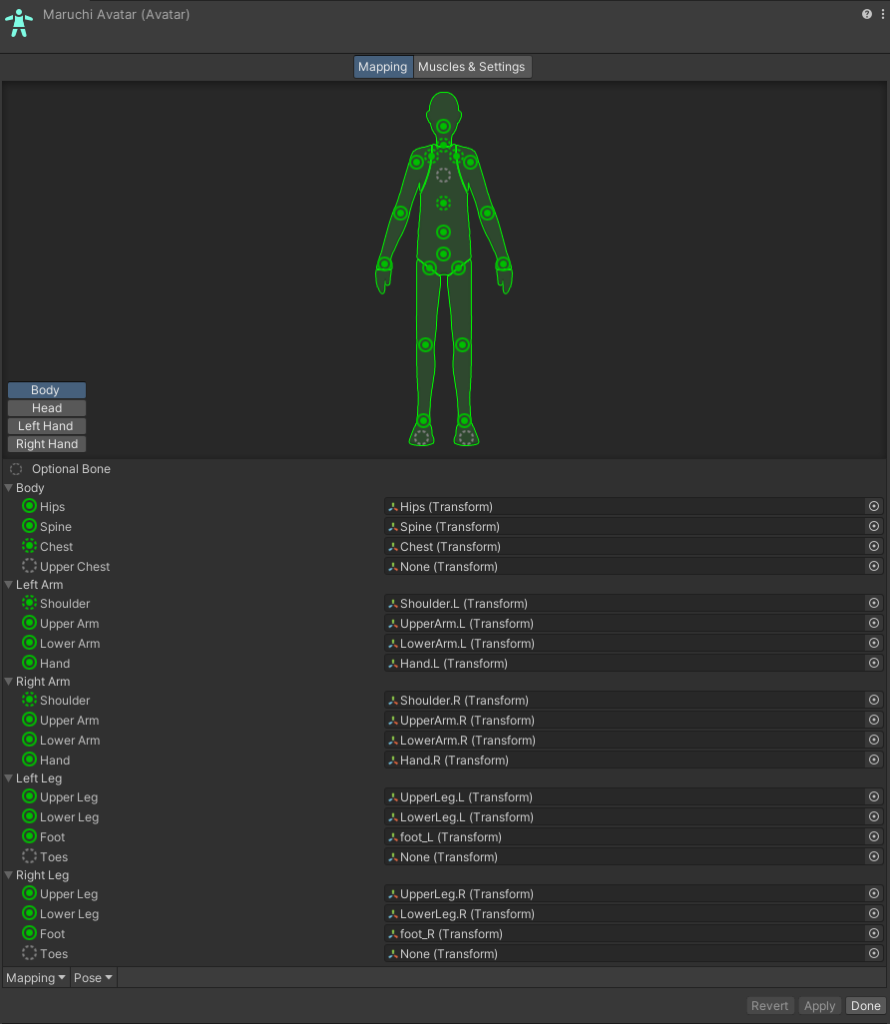
First, in the Rig tab of your new model, click the dropdown menu that says “Generic” and change it to “Humanoid.”
This will give you the option to Apply and Configure the rig. Once you’ve applied the humanoid rig, click on the Configure button that appears and make sure all the bones in your new mesh are linked correctly, matching the bones in your main character’s rig.
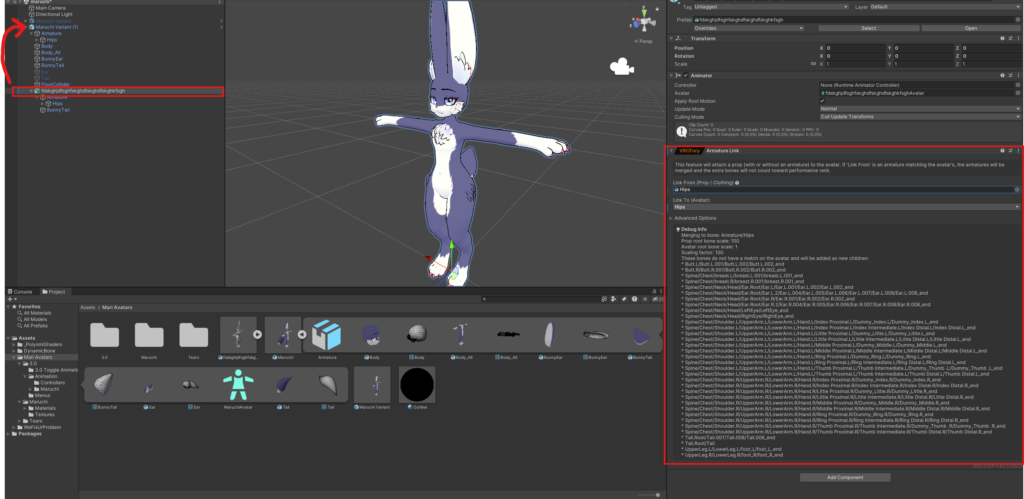
Next, drag the root of your outline onto the root of your avatar, add a component, search for ‘Armature Link’, and add it.

Next you’ll want to add a Blendshape Link component.
The ‘Body’ in the text box will be the name of the renderer on your character
The BunnyTail will be the name of the renderer on your outline
As the Maruchi has multiple renderers. We’ll need to add multiple of these components to link them all.
Since VRChat’s built-in viseme system is locked down for whatever reason, we’ll use a component called VRCFury’s Advanced Visemes to handle this.
On the root of your avatar in the Unity Hierarchy, click Add Component.
Search for “VRCFury” and select the “VRCFury | Advanced Visemes” component to add it.
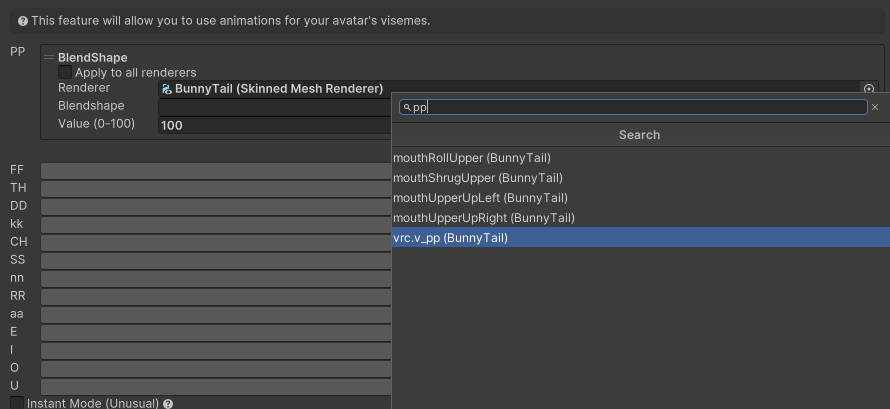
In the new component, you will see a list of VRChat’s standard visemes (e.g., sil, PP, FF, TH, etc.).
For the first viseme, click the “Add action” button and select “Blendshape” from the dropdown menu.
The Advanced Viseme system is a bit more rigid than VRChat’s default. To avoid making your main character’s face look robotic or “jerky,” you must prevent this system from affecting anything but your outline mesh.
Uncheck the box labeled “Apply to all renderers.” This ensures the blendshape action is not applied globally.
Locate the “Renderer” slot within the blendshape action you just created.
Drag and drop the renderer of your new outline mesh into this slot.
Click on the search button next to the “Blendshape” field.
A list of all the blendshapes on your outline mesh will appear. Find and select the blendshape that corresponds to the viseme you are currently setting up (e.g., for the “aa” viseme, select the “aa” blendshape).
Repeat steps 2 through 5 for every single viseme listed in the VRCFury component, making sure each one is linked to its matching blendshape on your outline mesh.
And that’s it! Your outline should be good to go.
Hit ‘Upload’ on your avatar, and if everything was done right, you’ll have a working outline on your Quest avatar.
Having trouble? Message @Shadakiuh on Telegram or Discord and I will try my best to guide you.